Google Search Console Tutorial: Checking for CWV Errors
As a website owner, keeping an eye on your site’s performance is crucial for both user experience and search engine optimization (SEO). Google’s Core Web Vitals (CWV) are an important set of metrics that measure real-world user experience for loading performance, interactivity, and visual stability. CWV errors can negatively impact your search rankings, so it’s […]
Google Ad Manager Helpful Content Update Optimizing Revenue SEO

August 26th, 2025
As a website owner, keeping an eye on your site’s performance is crucial for both user experience and search engine optimization (SEO). Google’s Core Web Vitals (CWV) are an important set of metrics that measure real-world user experience for loading performance, interactivity, and visual stability. CWV errors can negatively impact your search rankings, so it’s essential to regularly check and address them. In this Google Search Console Tutorial, we will explore how to effectively monitor these metrics.
This Google Search Console Tutorial will guide you through the process of checking for CWV errors in Google Search Console, a free tool that helps you monitor and troubleshoot your website’s presence in Google Search results.
This Google Search Console Tutorial will guide you through the process of checking for CWV errors in Google Search Console, a free tool that helps you monitor and troubleshoot your website’s presence in Google Search results.
Comprehensive Guide: Google Search Console Tutorial
Step 1: Access Google Search Console
First, you’ll need to log in to your Google Search Console account. If you haven’t already set up your website with Search Console, you’ll need to do so.
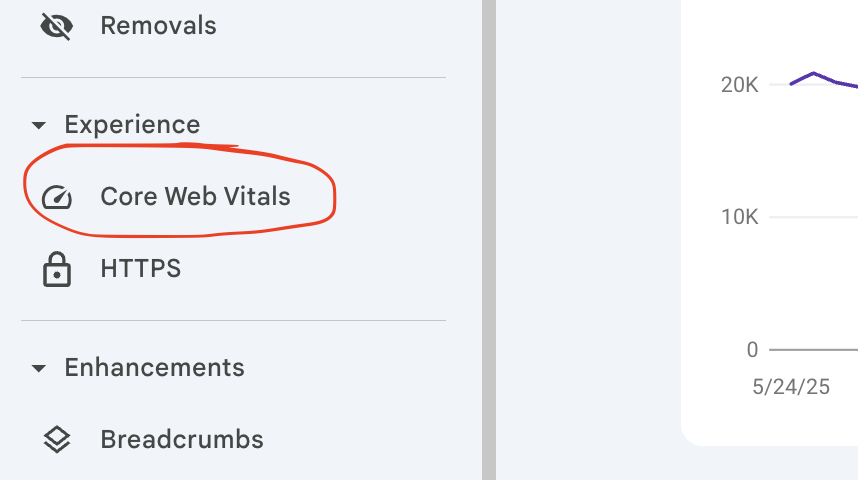
Step 2: Navigate to the Core Web Vitals Report
Once you’re in Search Console, look for the “Core Web Vitals” section in the left-hand navigation menu. Click on it.
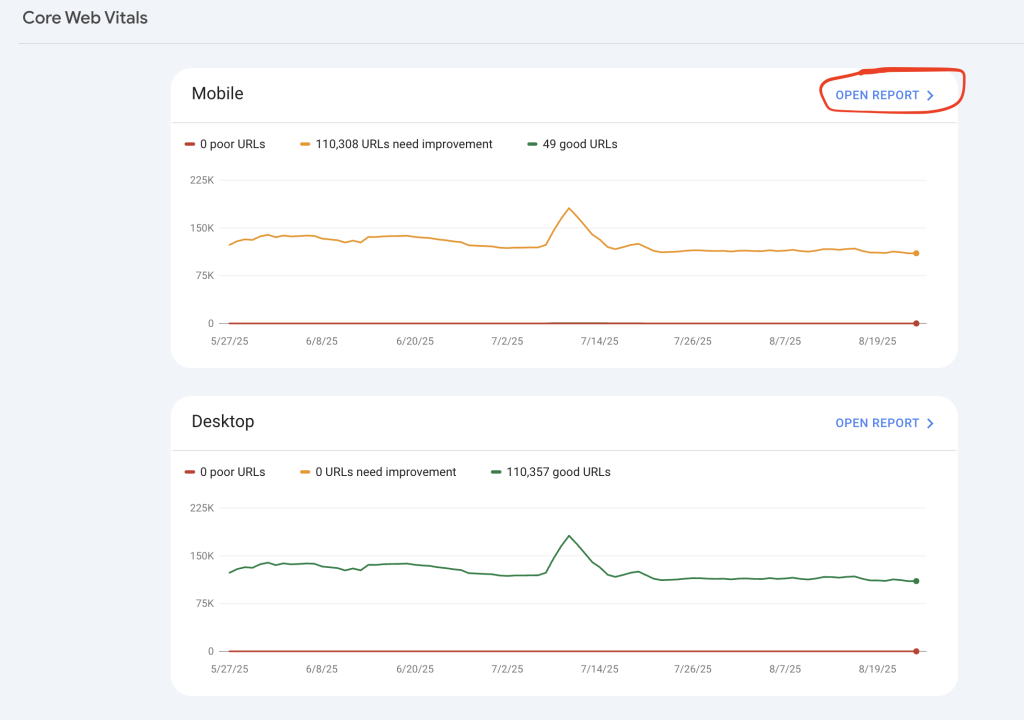
Step 3: Review the Report for Mobile and Desktop
The Core Web Vitals report provides data for both mobile and desktop versions of your website. It’s important to check both, as performance can vary significantly between device types. You’ll see a summary of “Poor,” “Needs improvement,” and “Good” URLs.
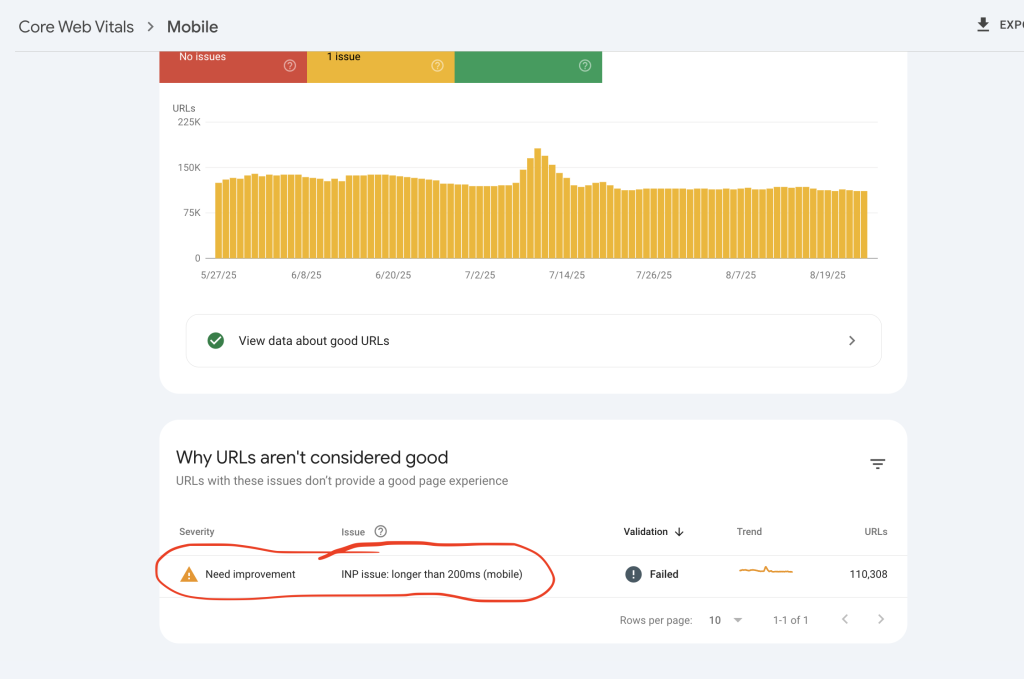
Step 4: Drill Down into Specific Issues
If you have “Poor” or “Needs improvement” URLs, click on the respective section to see more details about the identified issues. For example, if you click on “Poor (mobile),” you’ll see a list of URLs and the specific CWV metrics that are failing (e.g., LCP issue: longer than 4s).
Step 5: Understand the CWV Metrics
The Core Web Vitals report focuses on three main metrics:
- Largest Contentful Paint (LCP): Measures loading performance. It should occur within 2.5 seconds of when the page first starts loading.
- First Input Delay (FID): Measures interactivity. It should be 100 milliseconds or less. (Note: In the report, FID issues might be represented by a related metric like “Total Blocking Time” (TBT) in some tools, but the underlying goal is to measure input responsiveness.)
- Cumulative Layout Shift (CLS): Measures visual stability. It should be 0.1. or less.
Step 6: Identify and Fix Errors
Once you’ve identified the specific URLs and the CWV metrics that are failing, you can start investigating the root cause. Google Search Console will often provide links to resources that explain the issues and offer potential solutions. Common causes of CWV errors include:
- Large image files: Optimize images for web.
- Render-blocking JavaScript and CSS: Defer non-critical scripts.
- Slow server response times: Improve hosting or server performance.
- Lack of dimension attributes on images: Specify image dimensions to prevent layout shifts.
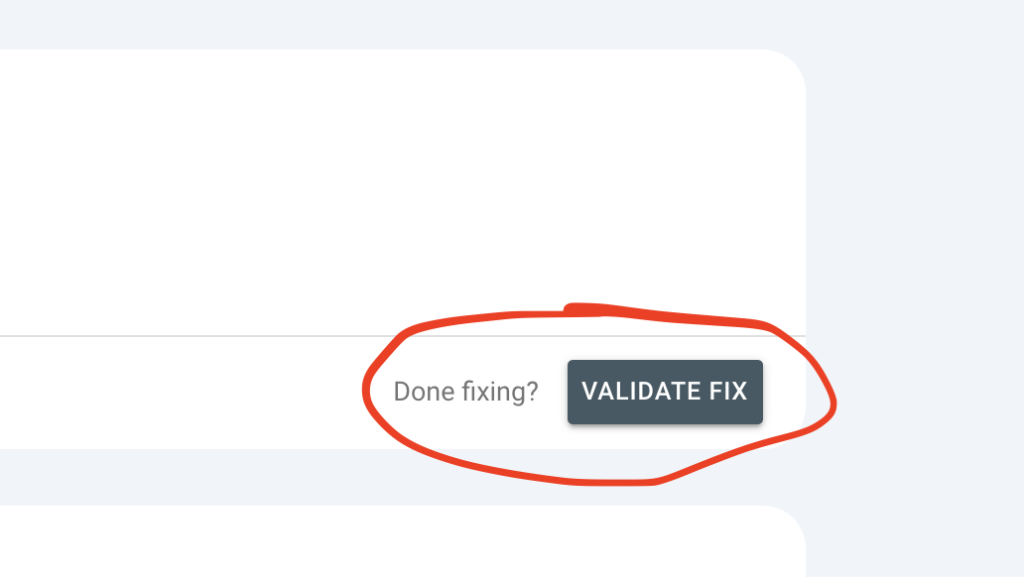
Step 7: Validate Fixes
After you’ve implemented fixes for the identified issues, you can inform Google that you’ve resolved the problems. In the Core Web Vitals report, click on the issue you’ve addressed, and then click the “Validate Fix” button. Google will then re-crawl and re-evaluate your pages.
The first time you request a fix, the button will look like this:
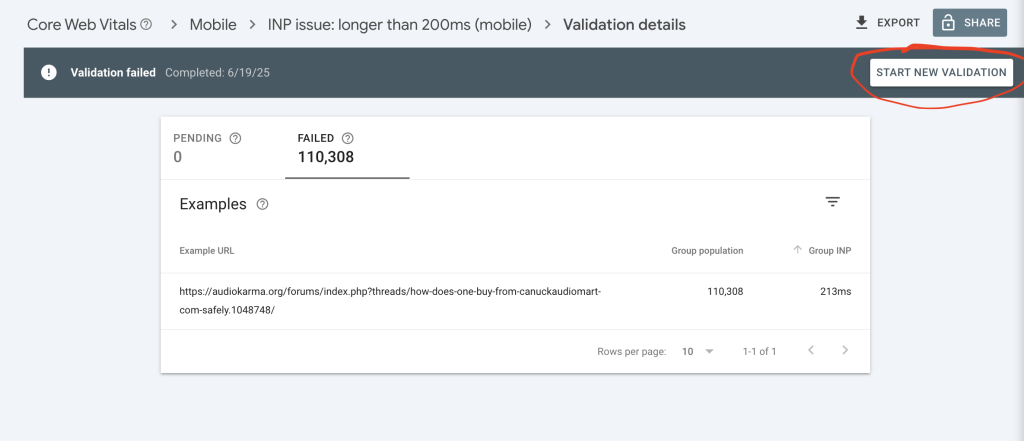
Or, if you have already tried and failed at a validation you are looking for the button that says “Start New Validation”:
Remember, improving Core Web Vitals is an ongoing process. Regularly check your Google Search Console reports, especially after making significant changes to your website, to ensure a consistently excellent user experience.
If you need assistance with this, reach out to your Advally rep for information on our WebOps services. Our team can assist identifying and fixing the issues for you.
Related Blogs
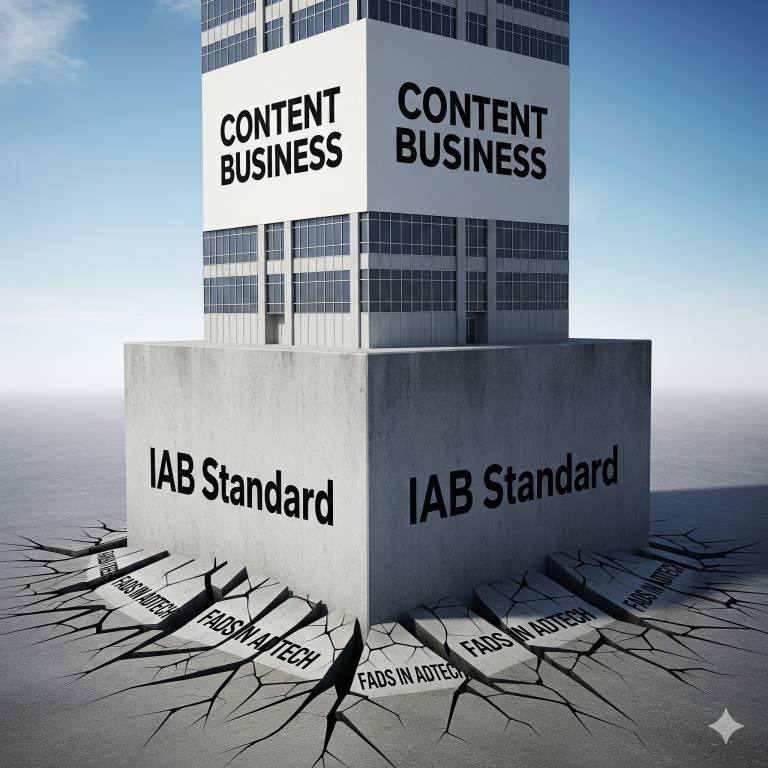
What “IAB Standard Banners” Look Like on a Modern Website
August 27th, 2025 by Doug Bishop
In the evolving landscape of digital publishing, display advertising remains a vital revenue stream. However, the way ads are presented and filled has transformed over the past decade. It is essential for publishers to grasp the significance of iab standard banners, recognize their presence on websites, and understand their impact on monthly earnings. The Basics: […]
Read More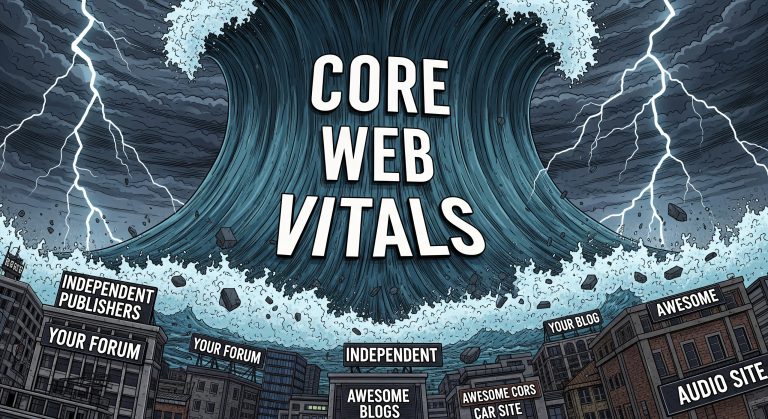
How Core Web Vitals Became Central to Search Rankings
August 25th, 2025 by Doug Bishop
Google’s Helpful Content Update in 2023 first exposed a painful truth for publishers: visitor experience metrics are now revenue metrics. In 2025, that reality has hardened. Core Web Vitals — Cumulative Layout Shift (CLS), Interaction to Next Paint (INP), and Largest Contentful Paint (LCP) — have become the silent killers of search visibility, draining traffic […]
Read More
Why Upgrading your CMS is the Best way to Increase Advertising Revenue.
August 26th, 2025 by Doug Bishop
Old CMS platforms can be responsible for 40% or more loss in monthly revenue for advertising-supported content properties.
Read More