Analytics Tagging For Member Segregation
This guide will help you to view traffic segments of your visitors based on the member type.
February 25th, 2025
This guide will help you to view traffic segments of your visitors based on the member type.
The guide assumes you want to track Guests and Members, however you can track any number of visitor types.
Step 1: Setup Custom Dimensions in Google Analytics
Step 2: Pass Custom Dimensions to Google Analytics
Implementation – JavaScript (gTag.js)
Implementation – JavaScript for Universal Analytics (UA) properties:
Notes on passing Dimension Value.
Step 3: Viewing Results in Google Analytics

Step 1: Setup Custom Dimensions in Google Analytics
1. Log into Analytics and open the property where you wish to view Members and Guests.
2. Open the “Admin” panel (link is at the bottom left), then under the Property click “Custom Dimensions” > “Custom Dimensions”
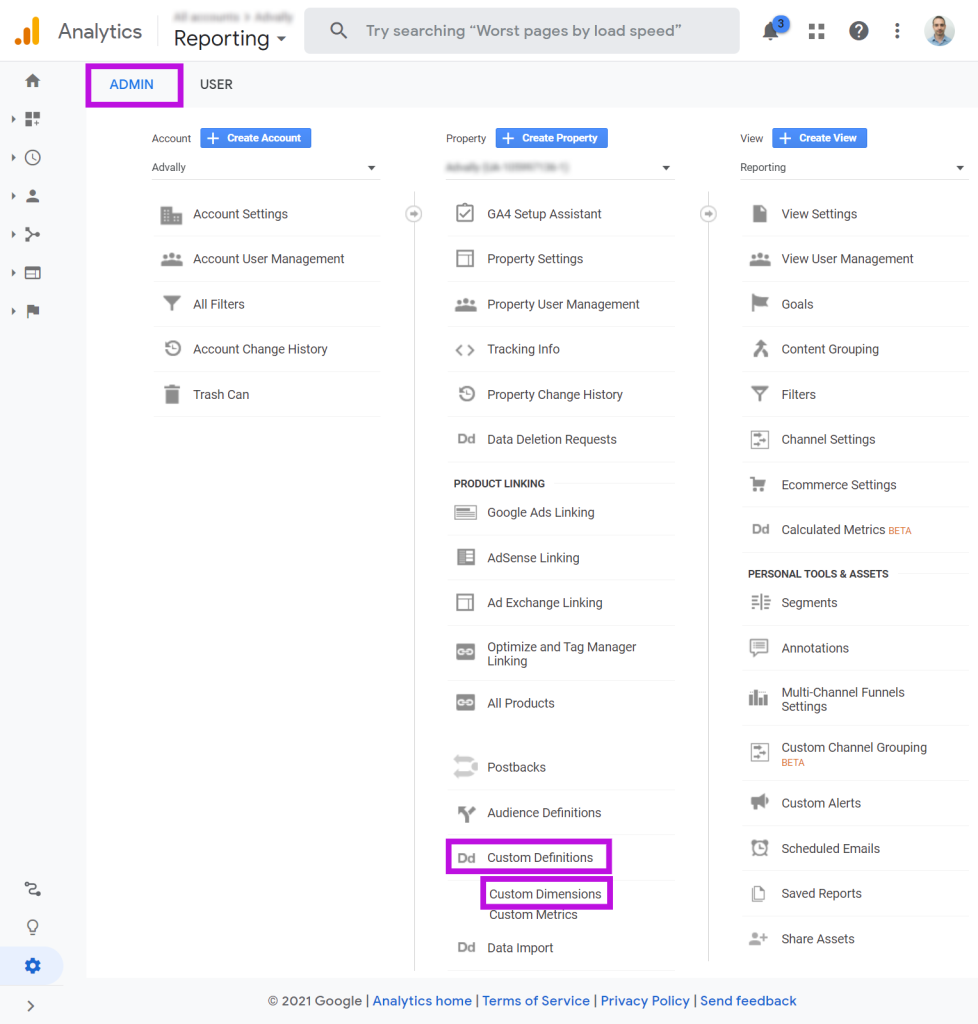
3.Click “+ NEW CUSTOM DIMENSION” to create a new Dimension. Enter the settings below and click “Create”
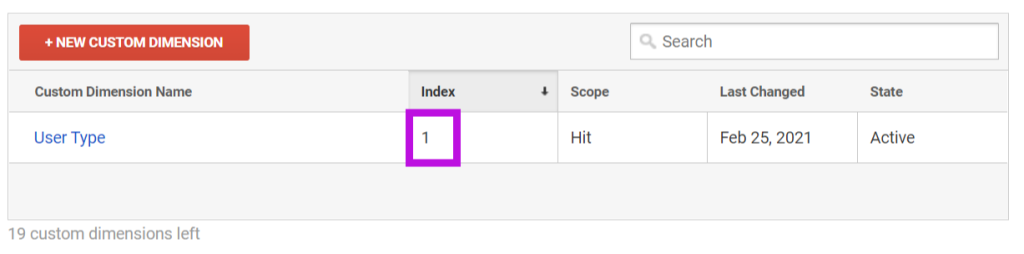
Name: User Type
Scope: Hit or Session
4.Make note of the “Index” value for your new dimension.
Step 2: Pass Custom Dimensions to Google Analytics
The next step is to update the on-page JavaScript to pass the correct value for this dimension. The instructions below presumes the “User Type” dimension was configured as Dimension Index #1. If other dimensions already exist and a different dimension index was assigned, please update the tags below to reflect the correct Dimension Index.
There are two on-page implementation methods depending on the type of Analytics script used.
Implementation – JavaScript (gTag.js)
1. Add the Custom Map before gtag(‘config’). Make sure to use the correct dimension ID.
| gtag(‘set’, { ‘custom_map’: { ‘dimension1‘: ‘User Type’ }});gtag(‘config’, ‘UA-XXXXXXXX-1’, … | // Insert before gtag(“config”)// Use the correct dimension ID// Existing gtag(“config”) |
2. Insert one of the following line into the 3rd parameter of gtag(‘config’). Set the value to match the current user type:
// Members
gtag(‘config’, ‘UA-XXXXXXXX-1’, {
‘User Type’: ‘Member’,
});
// Visitors
gtag(‘config’, ‘UA-XXXXXXXX-1’, {
‘User Type’: ‘Visitor’,
});
Here is the full documentation on custom dimensions with gtag():
https://developers.google.com/analytics/devguides/collection/gtagjs/custom-dims-mets
Implementation – JavaScript for Universal Analytics (UA) properties:
1.Add the Custom Dimension to the UA call. Add the appropriate value based on the user type
// Visitors
ga(‘set’, ‘dimension1’, ‘Visitor’);
// Members
ga(‘set’, ‘dimension1’, ‘Member’);
Notes on passing Dimension Value.
You can pass the dimension value in several ways depending on your CMS. It can be done entirely through JavaScript by checking for a value or element on the page that may indicate the user type. Or it can be done server-side.
Server-Side example with XenForo1 Template:
<xen:if is=”!{$visitor.user_id}”>
ga(‘set’, ‘dimension1’, ‘Visitor’);
<xen:else />
ga(‘set’, ‘dimension1’, ‘Member’);
</xen:if>
Server-Side example with XenForo2 Template:
<xf:if is=”!$xf.visitor.user_id”>
ga(‘set’, ‘dimension1’, ‘Visitor’);
<xf:else />
ga(‘set’, ‘dimension1’, ‘Member’);
</xf:if>
Client-Side example with JavaScript:
Here is an example of checking if the page has a “Log Out” link, thereby indicating the user is a member. The User type is set depending on the existence of the link.
if (document.querySelector(‘a#LogOut’)) {
ga(‘set’, ‘dimension1’, ‘Member’);
} else {
ga(‘set’, ‘dimension1’, ‘Visitor’);
}
Step 3: Viewing results in Google Analytics
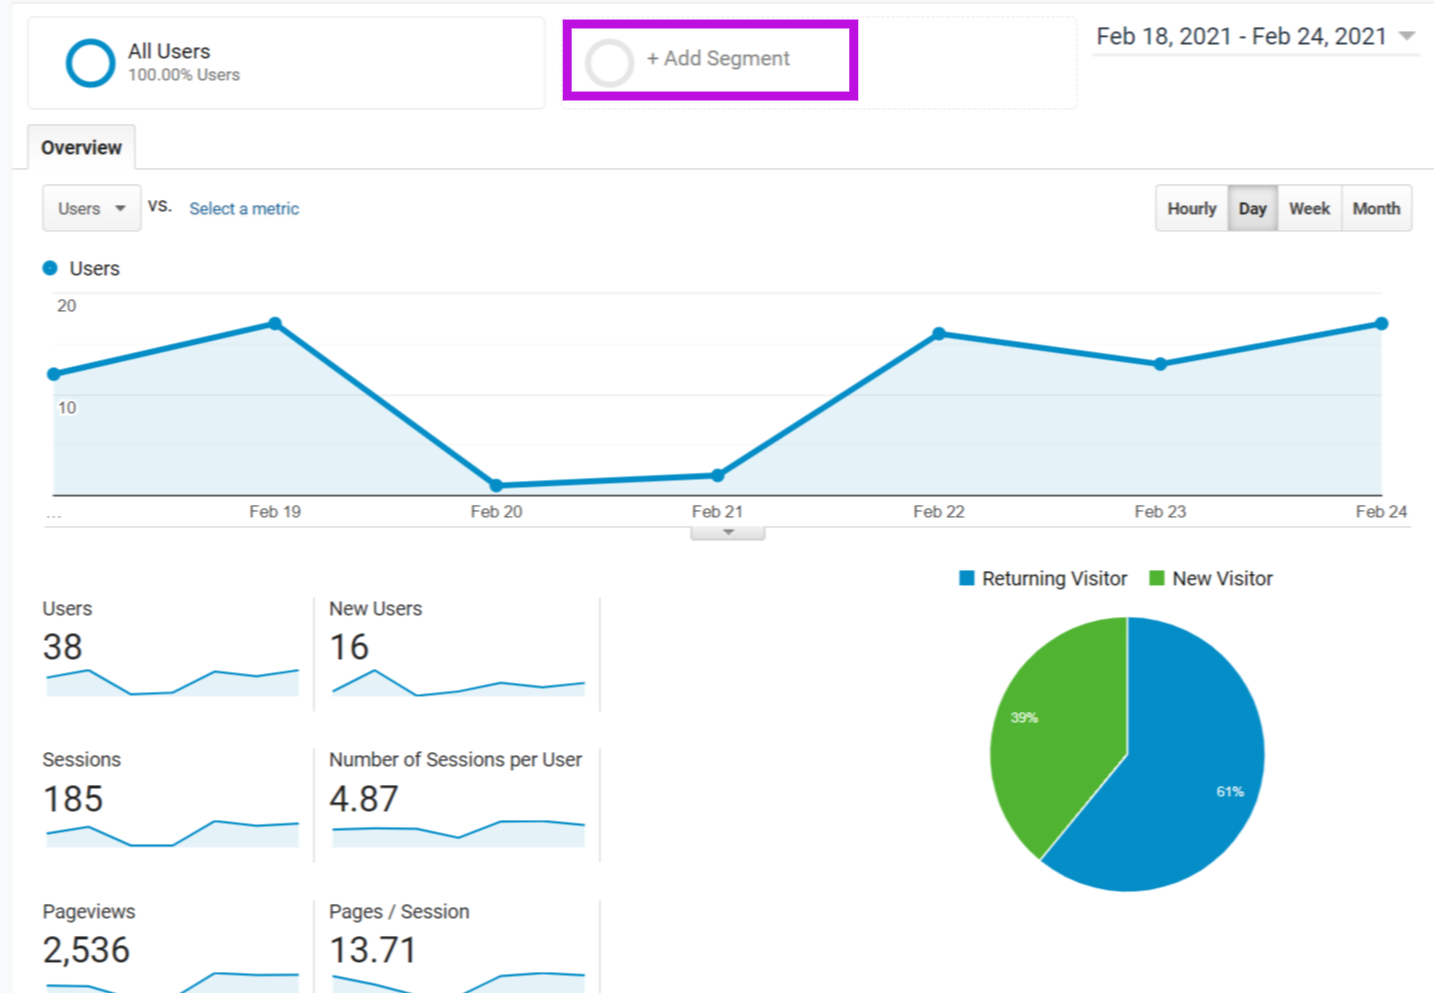
When the above tag changes are complete, results will begin to appear after 24 hours. You can view them in Analytics by creating a custom Segment.
1. Open the Audience Overview, or really any report under Audience, Acquisition or Behavior
2. At the top of the report click “+ Add Segment”
3. Click “New Segment
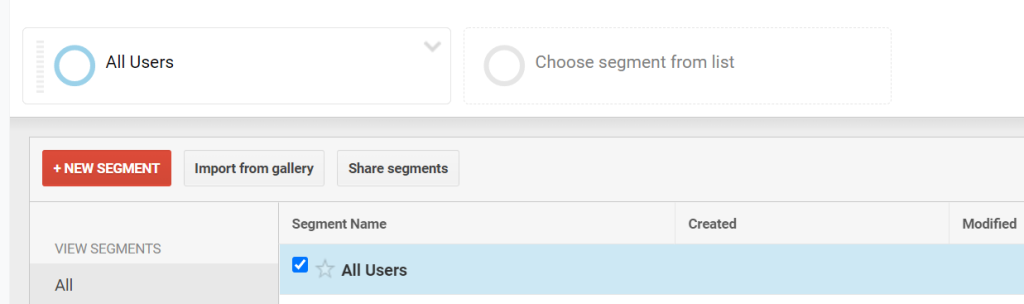
4. Enter a Name for the segment, like “User Type: Members” and add a condition on the Custom Dimension “User Type” is exactly equal to “Member”. Click the blue “Save” button to add the new segment.
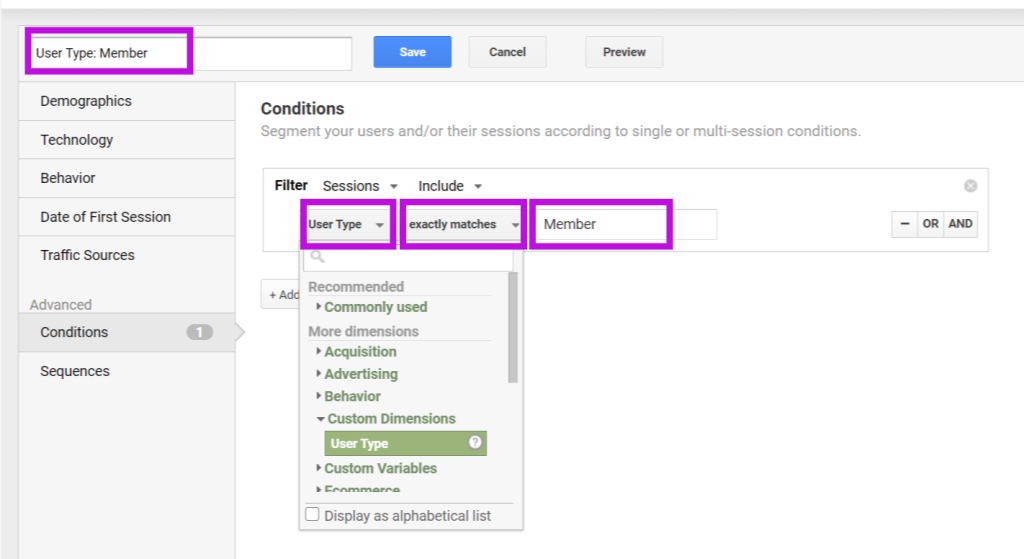
5. Repeat step 5 but for User Type: Visitor
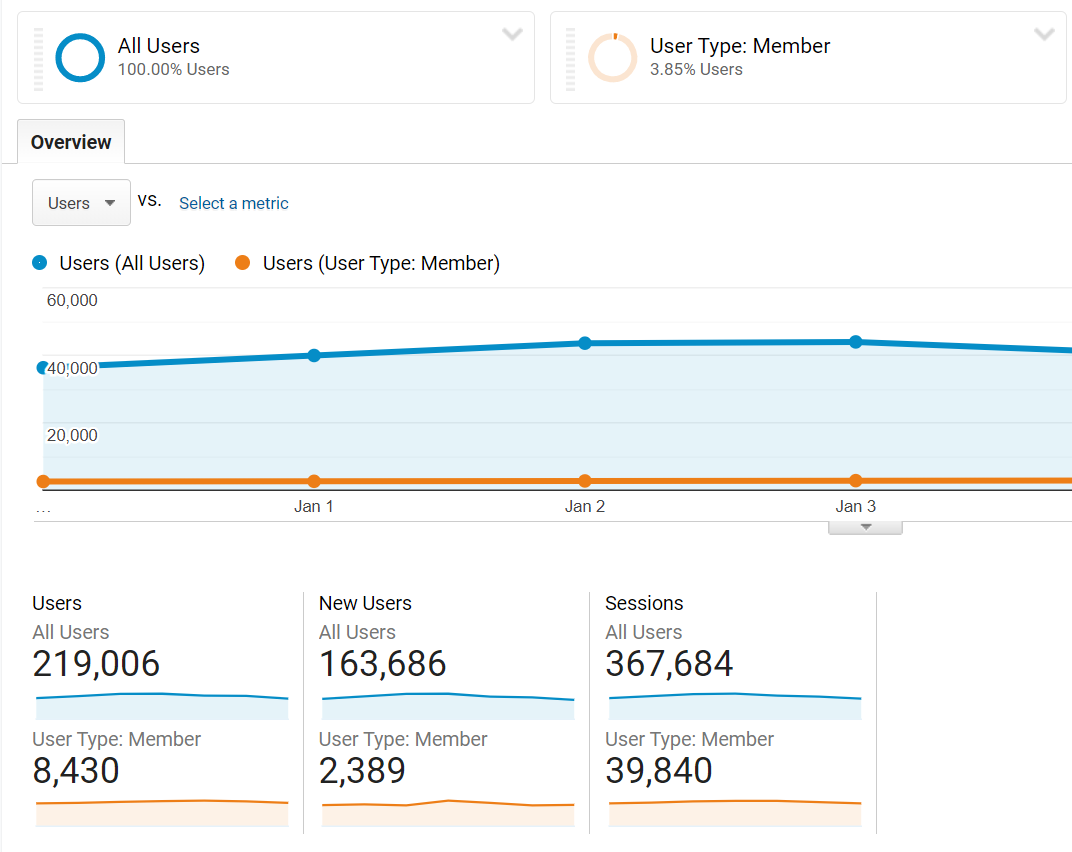
6. You can now select this segment to view the analytics for this segment as it relates to overall traffic.
We understand this can be a daunting task, if you require assistance, please do not hesitate to contact us at [email protected]
Related Blogs

Google Search Console Tutorial: Checking for CWV Errors
August 26th, 2025 by Doug Bishop
As a website owner, keeping an eye on your site’s performance is crucial for both user experience and search engine optimization (SEO). Google’s Core Web Vitals (CWV) are an important set of metrics that measure real-world user experience for loading performance, interactivity, and visual stability. CWV errors can negatively impact your search rankings, so it’s […]
Read More
How Core Web Vitals Became Central to Search Rankings
August 25th, 2025 by Doug Bishop
Google’s Helpful Content Update in 2023 first exposed a painful truth for publishers: visitor experience metrics are now revenue metrics. In 2025, that reality has hardened. Core Web Vitals — Cumulative Layout Shift (CLS), Interaction to Next Paint (INP), and Largest Contentful Paint (LCP) — have become the silent killers of search visibility, draining traffic […]
Read More
Why Upgrading your CMS is the Best way to Increase Advertising Revenue.
August 26th, 2025 by Doug Bishop
Old CMS platforms can be responsible for 40% or more loss in monthly revenue for advertising-supported content properties.
Read More